How to Install Rubber Rolls for a Home Gym
Share
How to Install Rubber Rolls for a Home Gym
Creating a home gym requires durable, shock-absorbing flooring, and rubber rolls are an excellent choice for this purpose. Not only do they provide a sturdy surface, but they also reduce noise and protect your underlying floor. Here's a step-by-step guide on how to install rubber rolls for your home gym, including tips for preparation, tools, and materials needed.
Preparing the Area for Installation
Proper preparation is crucial to ensure a smooth installation and a long-lasting result. Follow these steps to get started:
1. Measure the Area
- Use a measuring tape to determine the length and width of the space.
- Add 5-10% extra material to account for trimming and mistakes.
2. Clean the Surface
- Remove all furniture and equipment from the area.
- Sweep and vacuum the floor to eliminate dust, dirt, and debris.
- Mop the surface with a mild detergent if necessary and let it dry completely.
3. Check the Subfloor
- Ensure the subfloor is level and free of cracks or bumps.
- Use a leveling compound to address any uneven areas.
- For concrete subfloors, patch any cracks with a concrete repair product.
4. Acclimate the Rubber Rolls
- Lay out the rubber rolls in the room for 24-48 hours before installation.
- This allows the material to acclimate to the room’s temperature and humidity, reducing the likelihood of shrinkage or expansion after installation.
Tools and Materials Needed
Tools:
- Utility knife with a sharp blade
- Straight edge or metal ruler
- Measuring tape
- Chalk line or marker
- Floor roller (heavy-duty)
Materials:
- Rubber rolls (ensure they are suitable for gym use)
- Flooring adhesive (choose the type based on your subfloor)
- Urethane-based adhesive: Ideal for concrete subfloors.
- Pressure-sensitive adhesive: Suitable for temporary installations or wooden subfloors.
- Double-sided carpet tape (optional, for non-permanent installations)
- Clean rags and adhesive remover (for cleanup)
Installing the Rubber Rolls
1. Dry Fit the Rolls
- Roll out the rubber rolls in the designated area.
- Trim the edges with a utility knife and straight edge to ensure a snug fit.
- Align the rolls carefully to minimize visible seams.
2. Mark the Layout
- Use a chalk line to mark the edges of the rolls on the subfloor.
- This will act as a guide for adhesive application.
3. Apply Adhesive
- Follow the manufacturer’s instructions for your chosen adhesive.
- Use a trowel to spread a thin, even layer of adhesive on the subfloor, starting with one roll’s width.
- Work in small sections to prevent the adhesive from drying out before the rubber is laid.
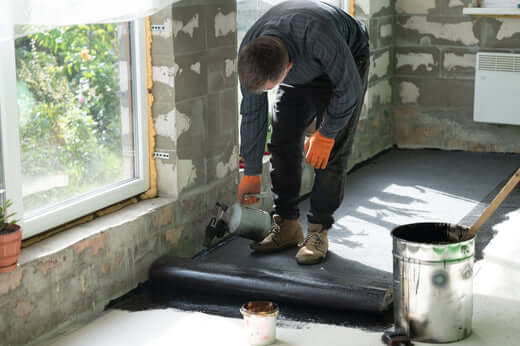
4. Lay the Rubber Rolls
- Carefully place the first roll onto the adhesive, aligning it with the chalk lines.
- Smooth the roll as you go to prevent air bubbles.
- Use a floor roller to press the roll firmly into the adhesive, ensuring a strong bond.
- Repeat the process for each roll, ensuring seams are tightly aligned.
5. Trim Excess Material
- Once all rolls are laid, use a utility knife to trim excess rubber along walls and fixtures.
- Ensure a clean, precise edge for a professional look.
6. Allow the Adhesive to Cure
- Refer to the adhesive manufacturer’s curing time, typically 24-48 hours.
- Avoid placing heavy equipment or walking on the floor during this time.
Maintenance Tips for Rubber Flooring
- Clean the flooring regularly with a vacuum or broom.
- Use a damp mop and mild detergent for deeper cleaning.
- Avoid using harsh chemicals or abrasive tools that can damage the surface.
Conclusion
Installing rubber rolls for your home gym is a straightforward process with the right preparation and tools. By following these steps, you’ll create a durable, professional-quality gym floor that enhances your workout experience while protecting your subfloor. With proper maintenance, your rubber flooring will last for years to come.
